
Modified Brush Layers
Modified brush layers create small terraces on dry raveling slopes using logs and live stakes. No heavy equipment is required. Learn when this BC soil bioengineering technique outperforms wattle fencing.
Layered Live Material
Brushy cuttings layered into excavated terraces provide both structure and vegetation in one step.
Steep Slope Application
Designed for angles too steep for conventional revegetation or standard brush layering.
Root and Canopy Together
Provides structural support first, with living cuttings taking over more of the stabilization function as they root and grow.
Modified brush layers treat dry, unstable slopes where wattle fences may not establish. Small terraces stop raveling and create sites for native vegetation where moisture is limited.
What Are Modified Brush Layers?
Modified brush layers stabilize dry raveling slopes that are too steep or too dry to hold vegetation. On these sites, surface material moves downhill in small, persistent failures.
The technique creates a series of small terraces across the slope using logs placed on the contour and anchored with live willow stakes. The terraces interrupt the downslope movement of surface material, accumulate a small wedge of soil and organic matter behind each log, and create the protected micro-environment conditions needed for vegetation to establish on a slope that would not support it otherwise.
Modified brush layers do not require heavy machinery. They are built with hand tools and suit slopes where equipment access is limited. They can fit some drier BC slopes where wattle-fence growth would be limited, but moisture, slope movement, material supply, and access still need assessment.
The technique was developed as part of David Polster's broader toolkit of soil bioengineering methods for treating the full range of slope instability problems encountered across BC's diverse landscapes.
The Problem: Dry Raveling Slopes
A raveling slope is one where fine sand, gravel, or decomposed rock continuously sheds from the face in a process driven by gravity, freeze-thaw cycles, and the erosive action of rain. Raveling is not a single catastrophic failure; it is a constant, low-level process that progressively strips material from the slope and prevents vegetation from establishing.
The challenge with raveling slopes is that the constant surface instability defeats revegetation attempts. Seeds cannot germinate in material that is moving. Transplanted seedlings have no stable substrate to root into. Even live stakes, if installed on a rapidly raveling surface, may lose their soil contact as material moves around and below them.
Stopping the raveling is the prerequisite for any revegetation success. Modified brush layers address this by creating log-terrace barriers that arrest the downslope movement of material and create stable planting microsites behind each structure.
Construction
Materials
- Logs: 2 m long sections of any locally available dead or cut timber, approximately 0.3 m in diameter. These provide the structural terrace face.
- Live stakes: Willow or red-osier dogwood cuttings (minimum 2.5 cm diameter, 1–1.5 m long) driven through or alongside the log to anchor it to the slope and to provide the living component of the structure.
- Additional plantings: Small willow, red-osier dogwood, or sword fern transplants can be placed in the accumulated soil behind the log to accelerate revegetation of the terrace bench.
On BC coastal sites, examples include Scouler's willow (Salix scouleriana), Hooker's willow (Salix hookeriana), and red-osier dogwood (Cornus stolonifera). In shade, sword fern (Polystichum munitum) may be appropriate where the site assessment supports it.
Installation
1. Identify contour lines across the slope at approximately 1–1.5 m vertical spacing. Closer spacing on steeper, more actively raveling slopes.
2. Place logs on the contour. Each log should run level across the slope, creating a horizontal bench face. The log should rest against the slope face rather than float free of it. Contact with the slope creates the wedge of accumulated material behind the log.
3. Drive live stakes through or alongside the log at 0.5–0.75 m intervals, angling the stakes slightly uphill. Stakes must penetrate deeply enough to anchor the log firmly against the slope and to reach soil moisture if available. On very dry slopes, stakes may not root successfully in the first season. Even unrooted stakes provide the anchor function until rooted stakes in wetter microsites behind the log take over.
4. Build the terrace bench. If soil is available, backfill behind the log to create a level 1–2 m wide bench. On actively raveling slopes, the bench will accumulate naturally as material is intercepted from upslope.
5. Plant the bench. Transplants of willow, red-osier dogwood, or other native species appropriate to the site can be installed in the bench immediately. These planting microsites behind the log have improved moisture retention and stability compared to the open slope face.
When to Use Modified Brush Layers vs. Wattle Fences
The choice between modified brush layers and wattle fences depends primarily on soil moisture availability:
| Site Condition | Recommended Technique |
|---|---|
| Moist slope, year-round moisture | Wattle fences |
| Streambank or riparian zone | Wattle fences or live bank protection |
| Dry slope, seasonal moisture only | Modified brush layers |
| Very dry, well-drained slope | Modified brush layers |
| Shaded slope, limited moisture | Modified brush layers with red-osier dogwood |
Wattle fences depend on the live stakes and horizontal cuttings laid behind the vertical posts rooting quickly and establishing vigorous growth, which requires sustained soil moisture through the growing season. On dry slopes where soil moisture is insufficient to reliably root willow cuttings, wattle fences will not establish successfully.
Modified brush layers work in drier conditions because the log component provides the structural function regardless of whether the live stakes root. Even if only a portion of the stakes establish in a dry year, the log terraces are intercepting material and creating accumulation benches. Revegetation proceeds from the planted material in the benches, which benefit from the improved moisture and stability of the accumulated soil wedge.
Real-World Applications
Long-Term Outcomes
Modified brush layer installations often progress through stages, but timing varies with slope movement, moisture, species, and follow-up care:
Installation: Log terraces in place. Downslope material transport arrested at each terrace line. Soil accumulation beginning behind logs.
First growing season: Rooted stakes producing shoot growth from the wetter microsites (typically the accumulated soil behind logs). Bench planting establishing. Bare slope face between terrace lines still largely unvegetated.
As roots establish: Bench vegetation can mature and spread onto the slope between structures. Root cohesion may begin to contribute to slope stability, subject to site conditions and monitoring.
As the treatment matures: Vegetation and accumulated soil may increasingly obscure the logs. The living material can take on more of the material-capture function as the support timber decays.
Longer term: Native shrub and herbaceous cover may develop as organic matter, soil structure, and root cohesion change. The condition should be judged through field monitoring rather than a fixed age threshold.
Frequently Asked Questions
Q: Can modified brush layers be installed on very steep slopes?
Modified brush layers are intended for raveling slopes where a supported bench can intercept moving material. Very steep slopes with active falling or mass movement may need other structural interventions. Slope angle, raveling rate, anchorage, moisture, and access are all factors we assess during a site visit.
Q: Do the logs rot over time? Does that affect the technique's effectiveness?
Yes. The logs will eventually decay, which is expected and acceptable. As the logs decay, established cuttings and accumulated soil can take over more of the structure's material-capture function. The timing depends on log species, moisture, climate, plant establishment, and site movement; monitoring should guide any follow-up work.
Q: Is there a version of this technique for cut slopes along roads?
Yes. Modified brush layers can be adapted for road cut stabilization where the cut face is too dry for wattle fences. The key modification is ensuring adequate anchorage of the log and stakes given the often-compacted, cut mineral soil of road cuts. We assess cut slope geometry and soil conditions as part of our site evaluation.
Modified Brush Layer Detail
This original diagram shows why modified brush layers work on drier, raveling slopes: small terrace structures create protected benches where material and vegetation can finally hold.
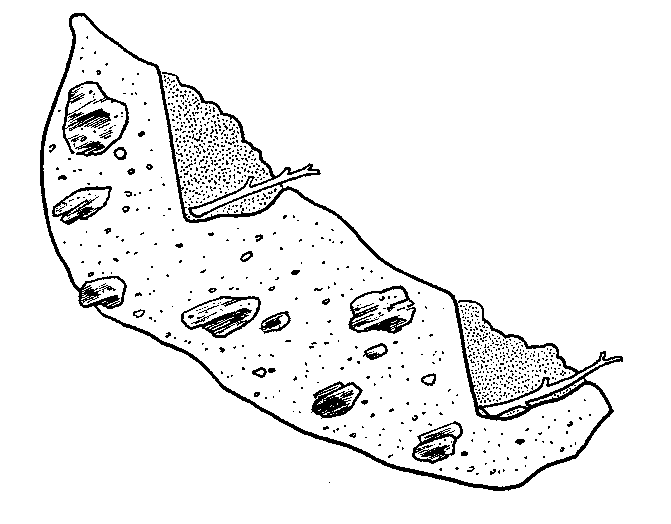
Terraced brush layer stabilization detail for dry slope conditions.
Modified Brush Layers During Construction
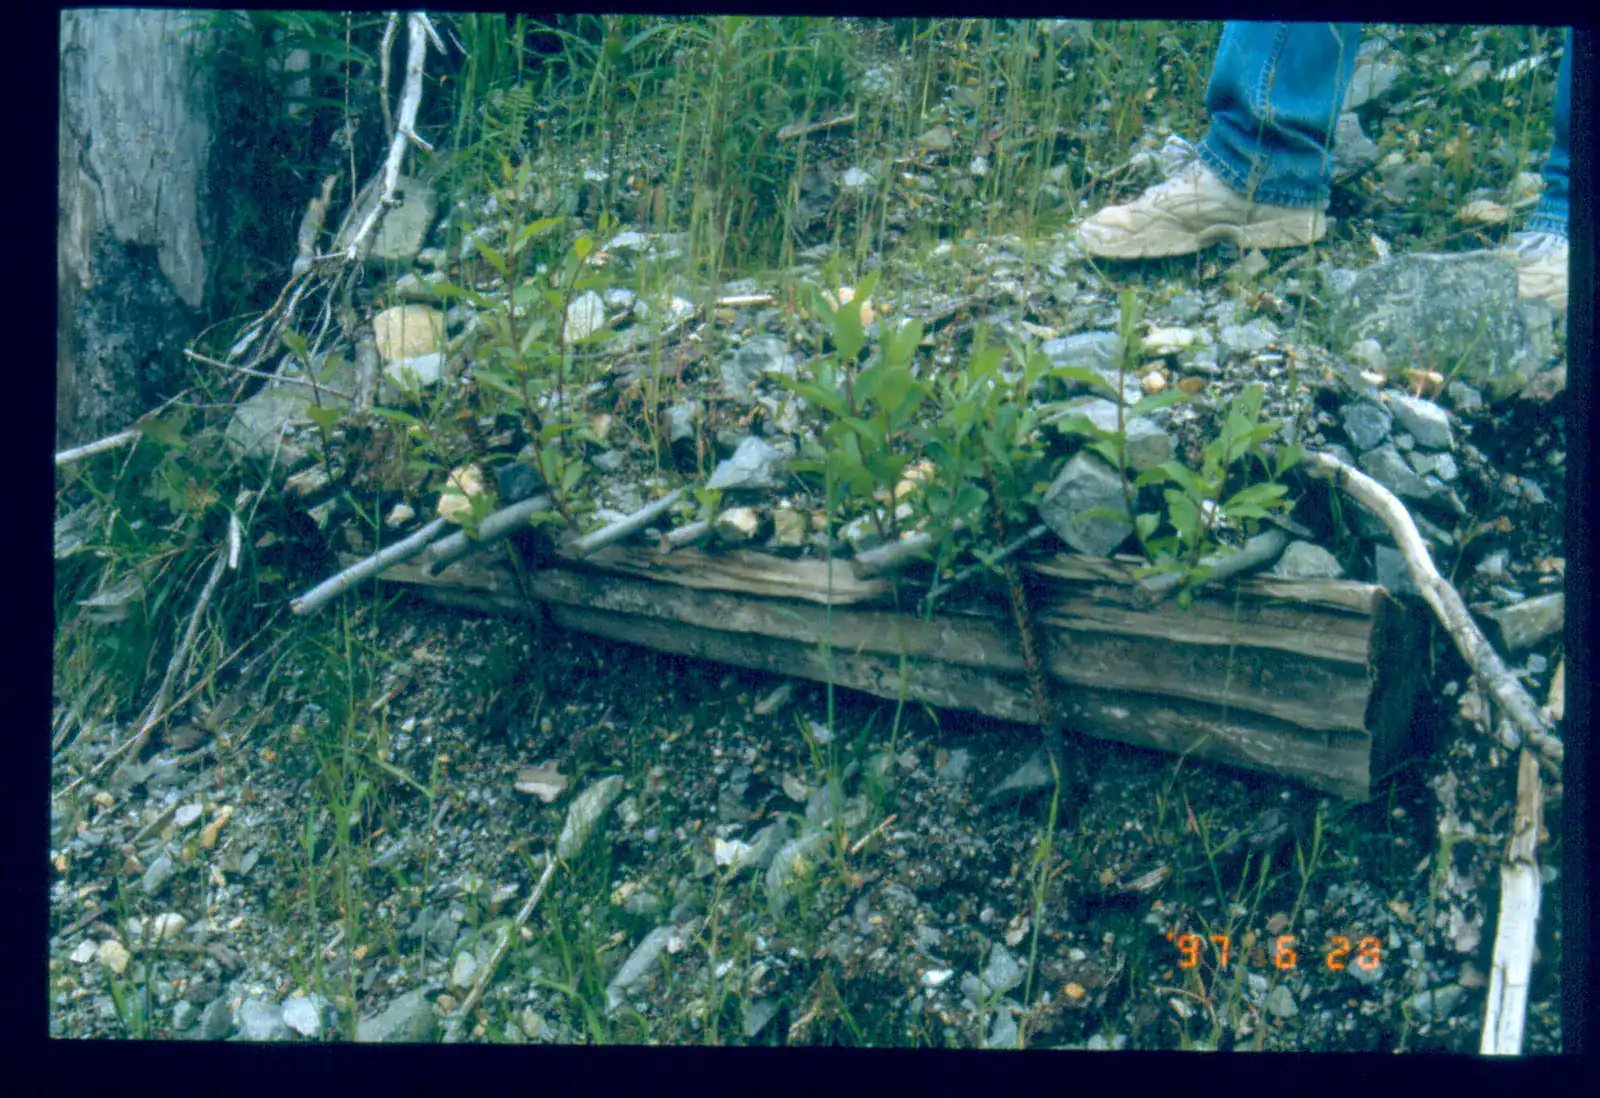
Modified brush layers being installed on a dry slope, with logs and live stakes anchoring each brush terrace.
Modified brush layers: changing the recovery conditions
David Polster's field record follows a dry slope from open failure to early vegetation establishment. The method creates protected pockets where cuttings and native plants can begin the next stage of succession.
Source: David Polster, Segment MBL new, slides 20–21. These are dated field frames from different viewpoints, not a registered fixed-camera comparison or a named public project claim.
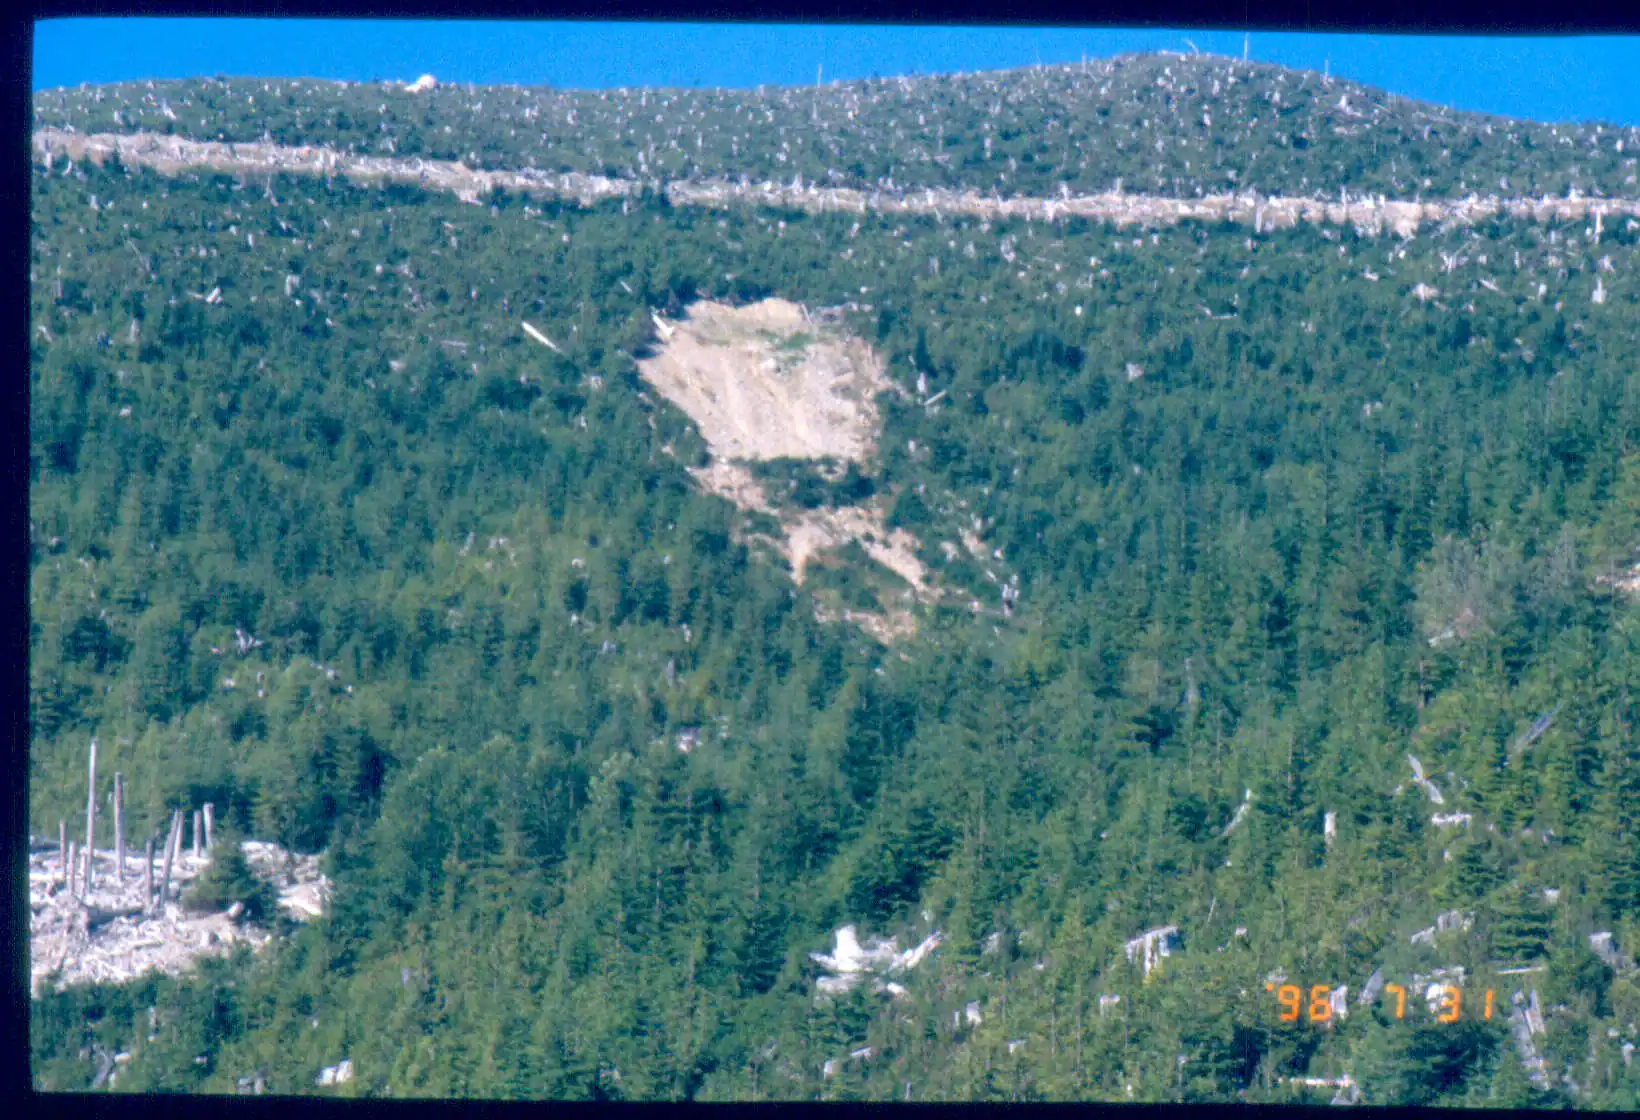 July 31, 1996 · open failure
Open slope failure photographed July 31, 1996.
Related Methods and Next Steps
Is This the Right Technique for Your Site?
We assess slope geometry, fill condition, moisture, and equipment access to determine lift spacing, live material requirements, and structural backfill needs.
Sources and further reading
These references provide wider technical context. Method selection and design remain site-specific.
Nile Creek: from bridge-end-fill gully to recovery
David Polster's field record follows a severe Nile Creek erosion gully from the April 1997 failure through live gully-break work and later brush-layer recovery.
A large gully cuts into the bridge end-fill beside Nile Creek.
Source: David Polster, Segment Nile Creek Erosion Gully and Segment Brush Layers in a Fill. The views are dated field records from different viewpoints, not a fixed-camera survey comparison.